Reducing false alarms in perimeter video analytics
Where false alarms on perimeter cameras come from, and how to reduce them with the least risk of missing a real intrusion.
One false alarm costs a moment of attention. Many of them cost trust. Operators can start to acknowledge alerts without looking, and a real intrusion may then be treated like the rest.
Sort the alarms before changing anything
Three outcomes matter when a perimeter is tuned. The terms are used in different ways across the industry. In this guide they mean:
- False alarm. Nothing of interest happened. A shadow, an insect or rain set off the rule.
- Nuisance alarm. The detection was correct, but nobody needed to know. A guard on patrol crossed the line, or a delivery arrived at its usual time.
- Missed event. Something real happened and no alarm was raised.
Each has a different fix. False alarms are mostly fixed in the picture and the rule. Nuisance alarms are mostly fixed with schedules and procedure. Missed events are the risk of tuning too far, which is why settings are changed with care.
- Applies to
- Intrusion, tripwire and loitering rules on outdoor cameras
- Main causes
- Light, weather, the lens and harmless movement
- Order of work
- The picture first, then the rule, then the threshold
- Afterwards
- Review the alarm log on a regular schedule
Look at the picture first
Analytics can judge only what the camera delivers, so the image is the first place to look.
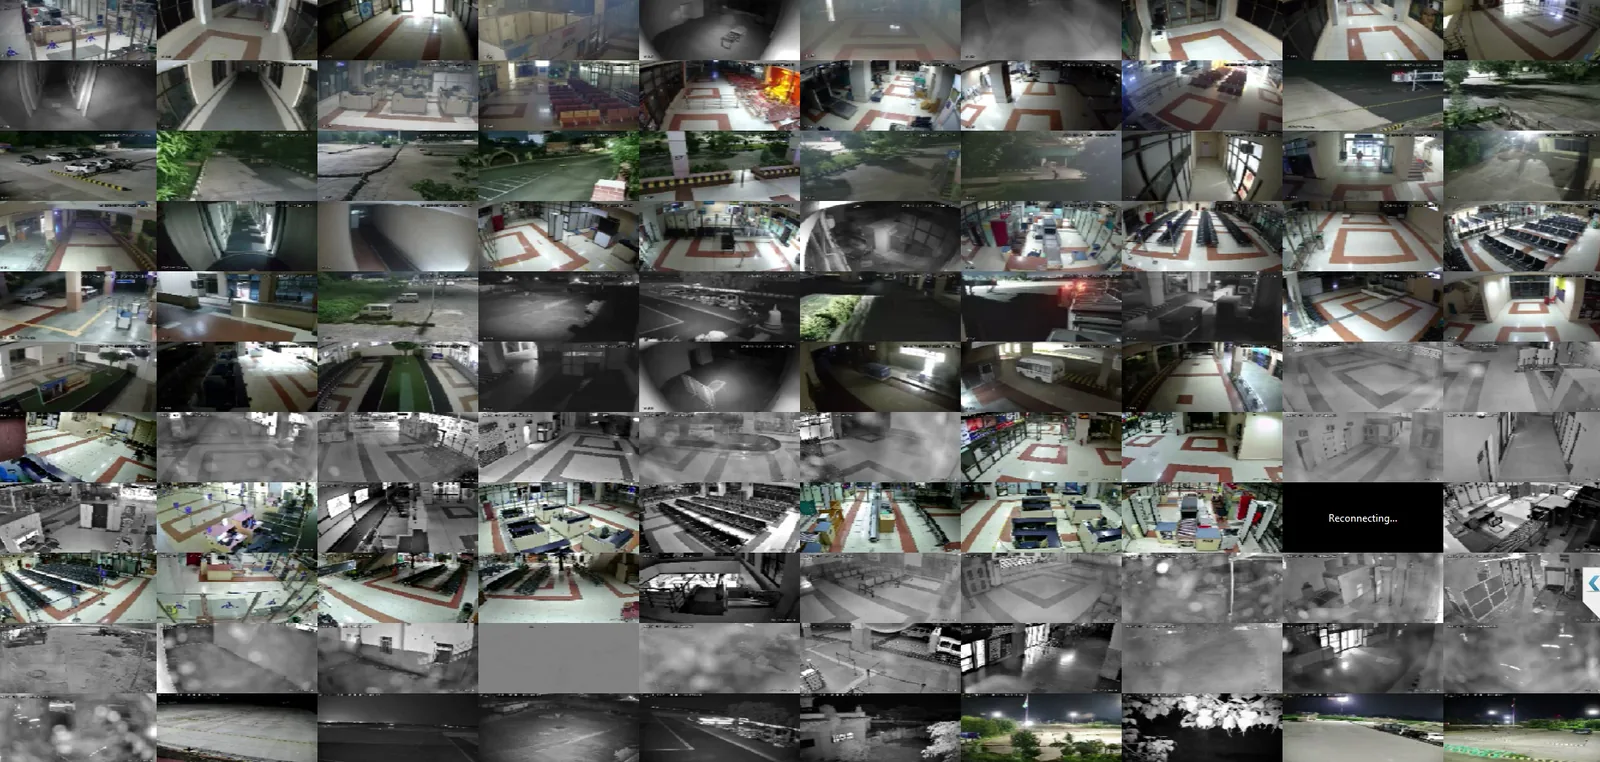
Each view is a different scene
Perimeter cameras work outdoors, at night and in bad weather. The picture changes from hour to hour and from one camera to the next.
Many of the views on this camera wall are in black-and-white night mode, and several are washed out by glare or blur. Each view needs its own settings.
Where false alarms come from
The common causes on outdoor cameras, what each one does to the picture, and the controls that usually help.
| Cause | What happens in the picture | Controls that help |
|---|---|---|
| Lighting changes | Cloud, dawn, dusk or a floodlight switching on changes the whole picture at once. | Object classification |
| Shadows | The shadow of a tree, a vehicle or a person outside the zone moves across it. | Object classification, tight zones |
| Headlights | Beams sweep along a fence or wall at night and can flare in the lens. | Camera siting, tight zones |
| Rain | Drops and streaks close to the lens look large and fast. Wet ground mirrors lights. | Size calibration, dwell-time rules |
| Insects and webs | At night, insects close to the lens are lit brightly by the infrared lamps. A web across the housing moves in the wind. | Lens maintenance, size calibration |
| Animals | Dogs, cattle and birds cross the zone. At a distance an animal can be hard to tell from a person. | Object classification, size calibration |
| Vegetation | Branches and tall grass move in the wind inside the zone. | Tight zones, cutting back growth |
| Camera shake | Wind or passing traffic can move the pole, so the whole picture moves. | Camera siting, a rigid mount |
| Reflections | Water, glass and polished surfaces repeat movement from somewhere else. | Camera siting, tight zones |
Controls that reduce false alarms
The controls are listed in working order: the camera and its picture, then the rule, then the people who handle the alarms.
- Camera siting
- Mount the camera so that a person in the zone is large enough to classify. Where the site allows, look along the fence line, not across the open ground beyond it. Avoid facing the low sun, a road with headlights or open water. Use a rigid mount so that wind does not move the picture.
- Lens maintenance
- Clean lenses and housings on a schedule and after storms. Remove webs. Check focus and aim after work on the pole. A dirty or shifted camera raises false alarms that settings alone rarely fix.
- Tight zones
- Draw the zone on the ground where an intruder would have to walk. Leave out trees, roads, public paths and the sky. A smaller zone holds fewer things that can set off the rule.
- Object classification
- Plain motion detection reacts to changed pixels, so light and weather can set it off. Analytics that classify what moved, such as a person, a vehicle or an animal, can ignore movement that the rule does not name.
- Size and perspective calibration
- Calibration tells the analytics how large a person appears near the camera and far from it. Objects that are the wrong size for their position, such as an insect close to the lens, can then be rejected.
- Rule schedules
- Arm each rule only for the hours it is needed. A gate that is busy by day may need an intrusion rule only at night. A schedule cuts nuisance alarms without changing how the rule detects while it is armed.
- Dwell-time rules
- Require an object to stay in the zone for a short time before the alarm is raised. This filters out fleeting triggers. Keep the delay shorter than the time an intruder needs to cross the zone.
- Operator procedure
- Give operators one fixed way to close an alarm: watch the clip, mark it real, false or nuisance, and note the cause. Those notes are the evidence for the next review.
The threshold trade-off
A threshold cannot remove false alarms and missed events together. It only moves the balance between them.
Analytics typically give each detection a confidence score. An alarm is raised when the score passes a threshold.
- Raise the threshold. Fewer false alarms, but a greater risk of missed events.
- Lower the threshold. Fewer missed events, but more false alarms.
The right point depends on the site. A sensitive boundary can accept more false alarms than a staff car park, because a missed event costs more there. Set the threshold for each camera and write down the reason.
Change the threshold last
If a camera stays quiet only at a very high threshold, the cause is usually in the picture or the zone. Fix that first.
Review the alarm log regularly
Scenes change. Vegetation grows, lights are added and cameras get knocked. A short, regular review keeps the settings in step with the scene.
-
Collect the alarms
Take the log for a fixed period, with the operator's note on each alarm.
-
Sort by cause
Group the alarms by camera and by cause. This shows which cameras and causes to deal with first.
-
Change one thing
Adjust the zone, the schedule, the mount or the lens. One change at a time shows what worked.
-
Test real detection
Have someone walk the zone by day and at night. Confirm that the alarm is still raised.
-
Record the change
Note what changed, when and why. The next review starts from that record.
How Videolytical approaches this
Videolytical's intrusion detection module covers tripwires and restricted zones. Zones, schedules and confidence thresholds are set for each camera, and false-alarm suppression uses scene calibration. The models are trained and hardened for field conditions such as glare, dust, monsoon rain and low light. On site, a pilot on a small set of cameras comes before scale-out with calibration, and optimisation continues after handover.
See the analytics on your own footage
Arrange a live demo, send a sample clip, or ask about a pilot on a small set of cameras.